Monthly Archives: April 2012
Depth of Field Bokeh effect using Mental Ray
1. Turn on Mental Ray
2. Create a camera, name it shotCam
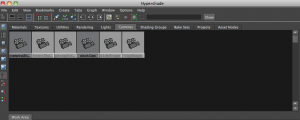
3. Open Hypershade and click on the Cameras tab
4. MMB – Drag shotCam into the work area
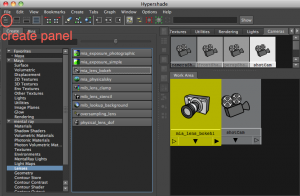
5. Open the create panel on the left, expand mental ray > lenses, click “mia-lens-bokeh”
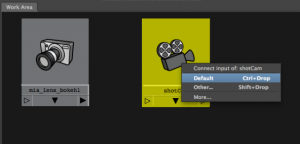
6. MMB drag “mia-lens-bokeh” onto shotCam, int the pop-up, click “dafault” for the input
7. In the Attributes editor you can play with the attributes of “mia-lens-bokeh”
Plane: This is the focus distance ( distance from camera to object you want in focus)
Radius: Larger = blurrier (bokeh amount)
Samples: increase to make it less grainy (bokeh quality)
Link to info about shader
To help with figuring out the focal distance:
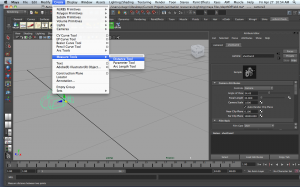
when you create the camera also create a distance tool
Label the first locator (cam_loc), the second locator (cam_focus) and the distance (cam_distance). Then in the outlier drag the locators and the distance under the camera.
You can the move the focus locator to the thing/area you want in focus. This is the value you place in the plane attribute of the lens shader.
Link about fur and mental ray
Batch Render
To do a batch render:
Change the file output in the render settings:
change the frame/animation ext to name.#.ext and the frame padding to 3 (or equal to max digits you will have as frame numbers)
Then when you are ready to render go to the render file menu and select batch render:
This will create a folder with a bunch of still images in your project folder which you will then import into a program like After Effects as an image sequence.
Reflective Surfaces
For a reflective surface:
1. In Hypershade, create a Phong or Blinn Material
2. Adjust the Reflectivity attribute
3. In render settings, go to Features tab and turn on raytracing
4. If you want shadows as well, select light, open attributes and enable Raytrace Shadows.
Nice Tutorial on UV mapping, plus UV mapping tools
Another Lighting Tutorial
Final
Animation I Final Project
Due: Tuesday May 8, in-class critique.
Create a character, an environment, and animate and render a short action.
Length: 100 to 200 frames (24fps)
Two or three story beats
Keep it simple so you can create something that is very clean and readable.
Example actions:
Pushing an object
Lifting something heavy
Personality walk
Jump
Short walk with change in direction
Use a static camera
Make sure the shot is composed well. Think about the Rule of Thirds and the line of action within the frame.
Tuesday 4/24:
- Still render of your environment
- Still render of your character
- Planning sketches of the action your character will be doing
Tuesday 5/8:
- In-class critique
- Have a playblast or rendered video uploaded to LMS and ready to present at the beginning of class


